Setup
Connect and Configure Planning Center
Connect Planning Center, choose a sync mode, map campuses and teams, and run the first church sync.
Complete this guide only if your church uses Planning Center. The connection is configured at the church level, then each Vigilant campus is mapped to the matching Planning Center location and Services team.
Before you start
- Use a Vigilant Admin account and a Planning Center account that can authorize the required church data.
- Create or review Vigilant campus locations first.
- Know which Planning Center Services team and service type belongs to each campus.
Connect Planning Center
- Open Church Admin > Scheduling Options, then open Planning Center. Confirm that Scheduling is enabled for the church.
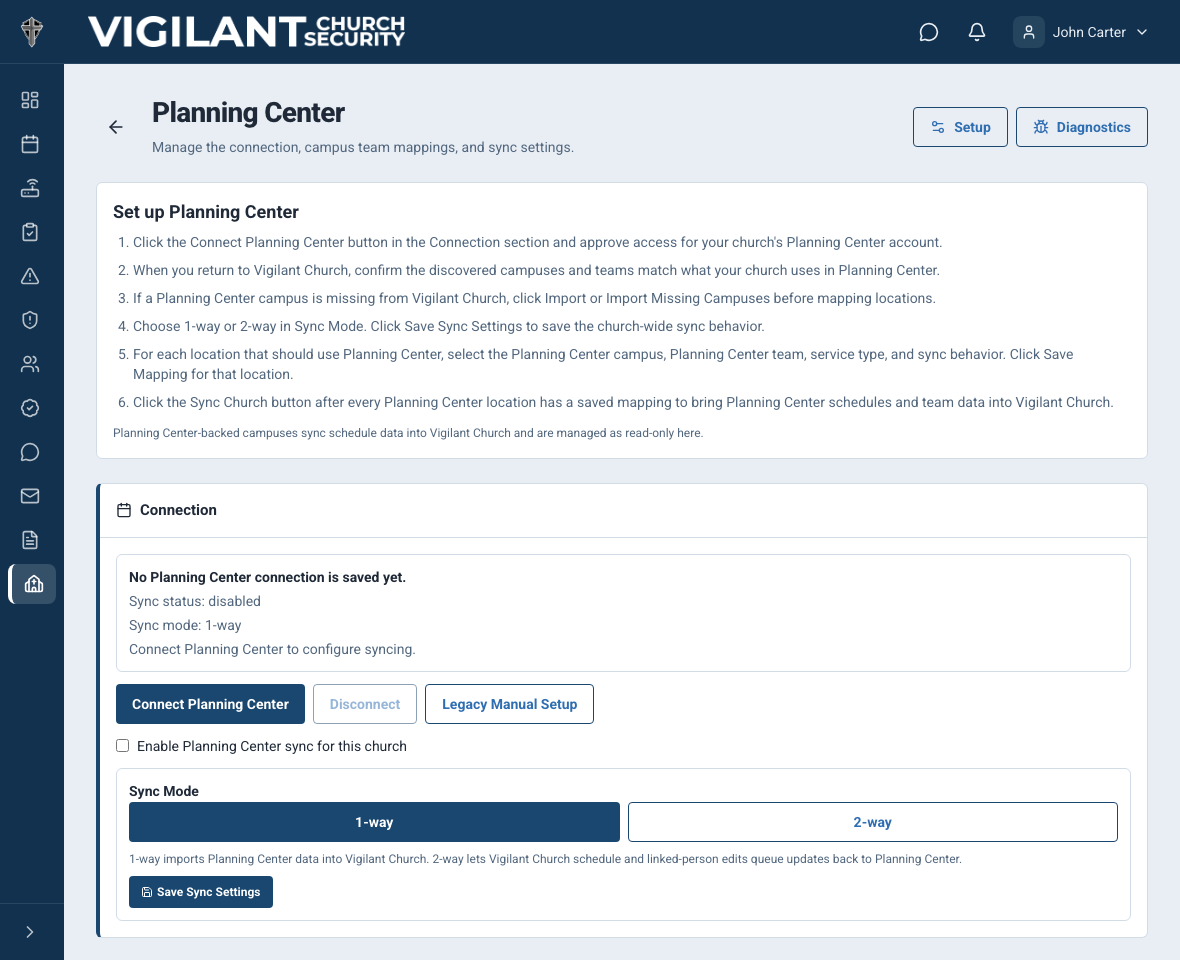
- In Connection, select Connect Planning Center.
- Sign in to Planning Center if prompted, review the requested access, and approve the connection.
- Return to Vigilant Church Security and confirm that discovered campuses and Services teams match what your church uses.
- If a Planning Center campus is missing from Vigilant, select Import for that campus or Import Missing Campuses before mapping locations.

Example shown with fictional demo data. View full-size screenshot.
Choose the church-wide sync behavior
- Keep Enable Planning Center sync for this church selected.
- Choose 1-way when Planning Center should remain the source of schedule and linked-person data.
- Choose 2-way only when authorized leaders should be able to queue supported Vigilant changes back to Planning Center.
- Select Save Sync Settings.
Map every Planning Center location
- Under Location Mapping, choose the matching Planning Center campus for the Vigilant location.
- Choose the Planning Center Services team and service type.
- Review the sync behavior and, when shown, map Planning Center team positions to the appropriate Vigilant roles.
- Select Save Mapping for that location.
- Repeat until every campus that uses Planning Center has a saved mapping.
- Select Sync Church.
Verify the first sync
- Confirm each mapped campus shows a healthy or expected sync status.
- Open Team and confirm the expected people and campus assignments appear.
- Open Schedules and confirm the expected services and team data appear for the correct campus.
- Use Diagnostics on the Planning Center page if discovery or sync results are incomplete.
Access, reconnecting and partial syncs
Connection controls require the appropriate administrative access and Planning Center availability for your church. Choose one-way or two-way deliberately: two-way permits supported outbound changes, not unrestricted editing of every Planning Center field.
If only some data appears, check the affected campus mapping and last sync result before reconnecting or repeating a sync. Preserve the visible error and time for Support. Keep Planning Center credentials and tokens private.
Disabling church-wide Scheduling disconnects Planning Center scheduling configuration. Re-enabling Scheduling does not restore credentials or campus mappings automatically; configure the connection again and verify a representative service and linked person.